create

Birdseed Ornaments

Birdseed ornament hanging on a tree.

At home bird feeders provide a rich opportunity for children to learn many different skills, while observing nature.
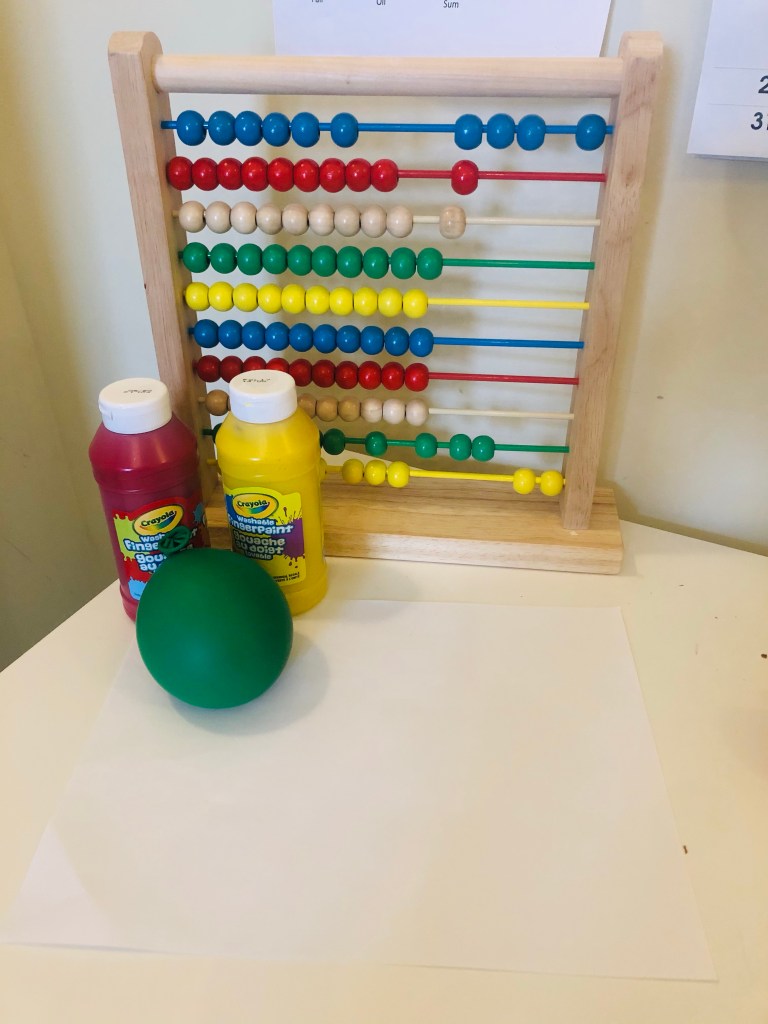
Supplies

  • 2 cups birdseed
  • 2 tbs or 2 individual packets of unflavoured gelatin
  • 2/3 cup boiling water
  • Cookie cutters
  • Straw (cut into pieces)
  • Parchment paper (or wax paper)
  • Large bowl
  • Baking sheet
  • Twine
Mixing the birdseed and gelatin.

Instructions

  1. Dissolve 2 tbsp (or 2 individual packets) of gelatin in 2/3 cup of boiling water.
  2. Add 2 cups of birdseed to completely dissolved gelatin. Mix for 2 minutes to allow the seeds to soak up gelatin mixture.
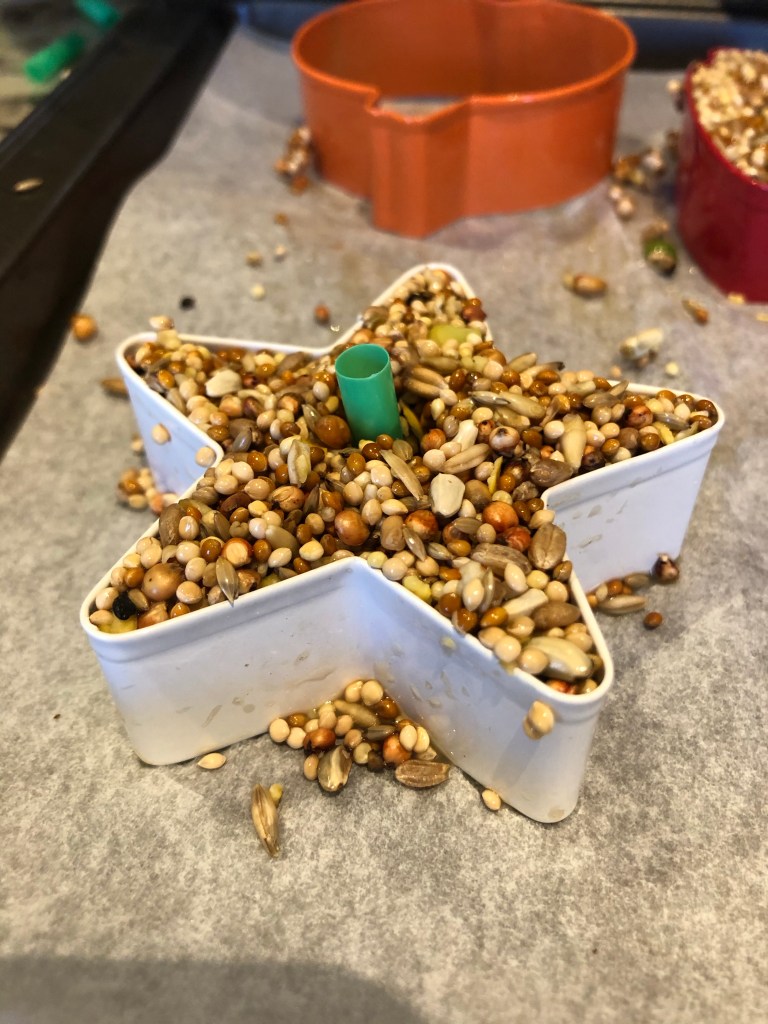
  3. Place cookie cutters onto a baking sheet lined with parchment paper.
  4. Fill cookie cutters with mixture (slightly above top), as the mixture needs to be tightly packed inside the cookie cutters.
  5. Place another sheet of parchment paper over the filled cookie cutters and press firmly to pack the seeds.
  6. Gently insert a straw into each shape. This will create a hole for the ornament to be hung.
  7. Allow the birdseed cookies to dry for 3-5 hours, flipping them half way though.
  8. Gently push the ornament out of the cookie cutters.
  9. Allow to continue drying overnight.
  10. Gently remove the straw the next morning. Loop the twine through the hole and secure with a knot.
  11. Your ornament is now ready to be hung outside. Enjoy observing the birds eat their treat.
Packing the birdseed int to the cookie cutters.

Adaptations

  • Have a clipboard with paper and a pencil attached so that children can draw or write down their observations. (can also be attached to the window).
  • Have binoculars available at a nearby window to observe the different birds and squirrels who visit the feeder. Tip: We like to use a suction cup hook attached to the window to hold the binoculars so that they are easily accessible).
  • Provide markers, pencil crayons, or water paints so the child can document what they see.
  • Explain the differences between types of birds, and males vs females (colours, size, appearance). Create a chart that children can fill in or check off every time they see a particular kind of bird. We get a lot of Goldfinch in our yard, and my daughter loved checking off whether it was male or female.
  • Incorporate math skills by adding up how many females, males, or kinds of birds.
  • Offer books about birds and squirrels for research (or print information off the internet).
  • Encourage children to ask questions and express their thoughts: what do birds eat? where do they sleep? Where do they live? What colours do you see? What sounds do they make? Different birds sound different? Can you tell what bird it is by how it sounds?
  • The University of Guelph created these amazing Biodiversity Identification sheets that are a fun addition to bird watching. The sheets are available for purchase for a small fee. https://www.uoguelph.ca/arboretum/educationandevents/id-sheets/backyard-birds
This snowman birdseed ornament is tightly packed.
Straw inserted into the birdseed ornament. This creates a hole for the twine to be looped through.

Skills

  • Observation
  • Sight
  • Cognitive
  • Listening
  • Visual discrimination
  • Math
  • Language
  • Fine Motor
  • Science: animals, nature, observation, record taking, documentation, environment, habitat etc

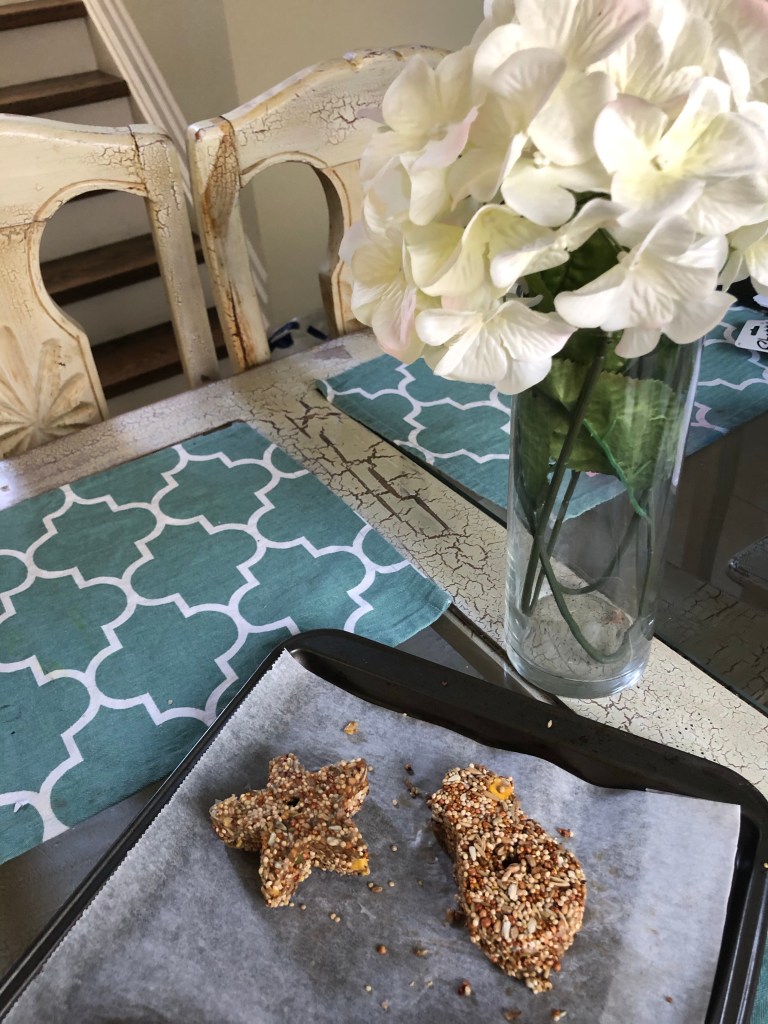
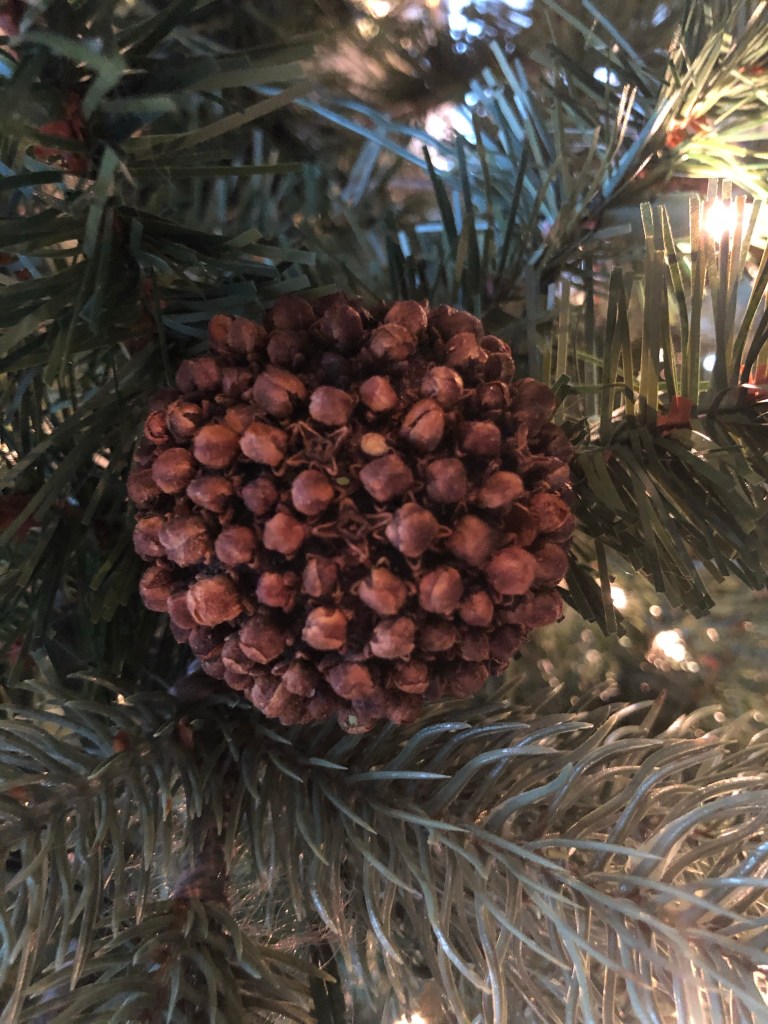
Birdseed ornaments air drying.

create

Sun Catcher

Sun catchers on display.

Supplies

  • Contact paper
  • Tissue paper
  • Optional: Card stock or construction paper

Instructions

  1. Cut two equal pieces of contact paper.
  2. Crumple, tear, cut or fold pieces of tissue paper. Remember, there is no wrong way!
  3. Place the pieces of tissue paper on to the sticky side of one of the pieces of contact paper.
  4. Seal your design by placing the unused piece of contact paper on top of your design.
  5. Tape your artwork to a window and admire the beautiful colours as the light shines through.
Sun catcher in progress. Papers have been torn, cut and crumpled to create this design.

Optional frame:

  1. Cut the centre out of a piece of card stock or construction paper, in any shape you prefer (ie. square, rectangle, circle or oval).
  2. Place the sticky side of one of the pieces of contact paper to the front of the frame.
  3. Flip over your frame and begin sticking the pieces of tissue paper to the sticky contact paper.
  4. Seal your design by placing the unused piece of contact paper on top of your design.
  5. Tape your artwork to a window and admire the beautiful colours as the light shines through.
A picture was drawn on with a pencil for this sun catcher in progress.

Skills

  • Fine motor
  • Creative
  • Colour recognition
  • Concentration and focus
Beautiful sun catcher that brightens up a January day.
create

Balloon Painting

Supplies

  • Balloons
  • Water
  • Paint
  • Paper
  • Plates
  • Optional: rice grains

Instructions

  1. Fill a balloon with water and tie a knot. We suggest you don’t overfill the balloon, as this will weaken the balloon.
  2. Pour paint onto a plastic plate. Repeat this step for as many colours as you would like.
  3. Dip the water balloon into the paint and dab it or roll it onto the paper.
  4. This is a great activity for younger children.

Adaptations

  • Fill up additional balloons with air or rice grains instead of water and begin painting. Do you notice any differences from painting with a balloon filled with water?

Skills

  • Sensory
  • Creative
  • Fine motor
  • Science
create

Popsicle Stick Ornaments

Supplies

  • Popsicle sticks
  • Paint
  • White glue (or glue gun for older children)
  • Beads, sequins, pompoms, twine, ribbon, etc

Instructions:

  1. Glue popsicle sticks to create a shape or design of choice.
  2. Paint and glue items on to the popsicle sticks to decorate your ornament.
  3. Remember to allow children to come up with their own creations! As always, process over product!

Ideas: reindeer, snowflakes, trees, stars

Skills

  • Fine motor
  • Creative
create

Pomander Ball

Supplies

  • Clementine
  • Cloves
  • Optional: toothpick, twine

Instructions

  1. Stick the pointy end of the cloves into the clementine.
  2. We like to stick the cloves all over the clementine and ensure that it is fully covered with cloves. This helps preserve the pomander ball.
  3. Allow the pomander to dry for a day or so. Once dry it can be hung on the tree with twine or can be placed in a bowl for decor. They smell beautiful.

Note:

If you are doing this activity with small children, you may find that pushing the cloves into the clementine may hurt their fingers. Adults can help with this activity. Alternatively, adults can make pre-made holes with a toothpick. This makes it easier for children to push the cloves into the clementine.

You may also find that your child only enjoys doing this activity for a short period of time or they may get tired. If your child is tired take a break and come back to it later when they show interest. Activities should always be fun and enjoyable.

Skills

  • Fine motor
  • Self regulation
  • Calming
create

Salt Dough Ornament

A beautiful salt dough ornament displayed on a mini tree.

These salt dough ornaments are a great gift for children to give. It allows children the opportunity to create a piece of art however they choose and in turn build their confidence.

Supplies

  • 1/2 cup flour
  • 1/4 cup salt
  • 1/4 cup hot water
  • Paint (acrylic or washable)
  • Twine
  • Optional: Mod podge

Note: We like to make a double batch.

Instructions

Air Dry Method
  1. Combine flour, salt and water together and mix to create a dough.
  2. Roll out dough with a rolling pin.
  3. Use your favourite cookie cutters to create shapes.
  4. Poke a hole in the top of the ornaments and allow to dry overnight.
  5. Paint your ornaments the next day with acrylic or washable paint. We like to apply a coat of mod podge after the paint has dried.
  6. Loop twine through hole and secure with knot.
  7. Remember process over product. Allow young children to use their imagination to create unique works of art.
Baking Method
  1. Preheat oven to 250 degrees F (120 degrees C).
  2. Combine flour, salt and water together and mix to create a dough.
  3. Roll out dough with a rolling pin.
  4. Use your favourite cookie cutters to create shapes.
  5. Poke a hole in the top of the ornament and place shapes on a baking sheet.
  6. Bake in preheated oven until shapes are dry and hard. This usually takes about two hours. Although, baking time can vary depending on how thick your shapes are.
  7. Allow ornaments to cool before painting with acrylic or washable paint. We like to apply a coat of mod podge after the paint has dried.
  8. Loop twine through hole and secure with knot.
  9. Remember process over product. Allow young children to use their imagination to create unique works of art.

Note: Keep away from dogs and other pets that may eat the ornament. The salt content can be toxic.

Salt dough ornaments that are drying and will soon be ready to be painted.

Skills

  • Math
  • Measurement
  • Counting
  • Numbers
  • Fine motor
  • Creative
  • Science
  • Sensory
Unique works of art that have been painted by creative hands.
create, Play

Cinnamon Play Dough

We used cookie cutters and beads to decorate and play with our play dough.

Supplies

  • 1 cup white flour
  • 3 tbs cinnamon (or sprinkle desired amount)
  • 1/2 cup salt (fine)
  • 2 tbs cream of tartar
  • 2 tbs vegetable oil
  • 1 cup of water
  • Optional: 2 tsp vanilla

Instructions

  1. Combine flour, salt, cream of tartar and cinnamon together in a pot.
  2. In a separate bowl combine oil and water together. Slowly add the mixture to dry ingredients while stirring.
  3. Cook on low . Continue to mix until dough is thick and pulls away from the sides. About 3-5 minutes.
  4. Knead! Knead! Knead!

Note: Store play dough in a ziplock bag.

Skills

  • Science
  • Math – measurements
  • Social skills
  • Creative
  • Fine motor
  • Imaginative play
  • Sensory
create

Candy Cane Bead Ornament

Supplies

  • Pipe cleaner
  • White and red beads (or colour of choice)

Instructions:

  1. Bend one end of pipe cleaner back.
  2. Add beads, one at a time to create a desired pattern (ie. 3 white, 1 red, 3 white, 1 red).
  3. Once you reach the other end, bend the pipe cleaner back and tuck it under the last bead.
  4. Bend your pipe cleaner into a candy cane shape.
  5. Hang your ornament on the tree.

Skills

  • Fine motor
  • Math
  • Patterns
  • Counting
  • Colour recognition
  • Cognitive skills
  • Creative
create

Painted Tree Cookies

Supplies

  • Wooden discs
  • Twine
  • Paint
  • Optional:
  • glitter, gems, or anything else you would like to decorate with.
  • mod podge, if you would like to seal your ornament.

Instructions

  1. Decorate the discs by painting a picture or design.
  2. Allow to dry.
  3. If you are sealing your ornament, paint with mod podge.
  4. Allow to dry.
  5. Loop the twine through predrilled hole and secure with a knot.
  6. Your ornament is complete and is ready to be hung on the tree or around the home.
  7. Be creative and have fun. It is important to remember that process over product is what’s most important 🙂

Note: We purchased our wooden discs on Amazon. The discs came with predrilled hole in the top and two choices of twine.

Skills

  • Fine motor skills
  • Creative
  • Art
  • Colours
  • Colour mixing
create

Fall Lantern Jar

Supplies

  • Mod podge
  • Plastic or glass jars
  • Paint brush
  • Leaves
  • Battery powered tea light

Directions

  1. Gather leaves that have fallen from the trees. There are so many beautiful colours this time of year. Different shades of yellow, orange and red!
  2. Paint the jar with mod podge and then stick the leaves to the wet surface.
  3. Allow to dry.
  4. Paint over your design with mod podge to seal.
  5. Allow to dry.
  6. Place your battery powered tea light in the jar and admire. This makes a beautiful fall decoration.

Skills

  • Botany
  • Science
  • Creative
  • Art
  • Fine motor skills